Hello everyone, it’s Shelfy and today I’m here with some instructions on how to create a cake to look like the Nintendo Switch.
Materials Needed:
- Cake mix or recipe and its respective ingredients (I used cake mix, 3 eggs, 1/2 cup of vegetable oil, and 1 cup of water)
- Whisk or rubber spatula
- Large cutting knife
- Baking spray
- One cake pan (9in x 13in)
- A tray or other platter to display and frost your cake on
- 3 small bowls
- 3 small spoons
- Sandwich bags
- Cake decorating tip (I used No.4 by Wilton)
- 2 tubs of white icing
- Red food coloring
- Black food coloring
OR
- Pre-dyed decorator’s icing in…
- Red
- Black
- White
- Gray
- One tub of regular white icing
Baking the Cake:
Baking a cake is pretty self explanatory here, simply follow the directions on your cake mix box or the recipe you are using. However, it is important to understand what type of pan you are using before baking. There are three options: dark/ nonstick, aluminum, and glass. Dark/ nonstick pans are probably the most common type of pan. There is no need to grease the pan if it is on the newer side, however if it is on the older side (like mine was) it is a good idea to use a bit of baking spray on it. Aluminum and glass pans should always be greased before baking anything, unless you want to never get a slice of that cake out! Different pans also have different baking times, check your recipe to see what it calls for. Once you’re ready to take your cake out of the oven, check that it is done by sticking a small knife or toothpick into the middle and if it comes out with no raw cake batter on it, then your cake is finished!
Icing the Cake:
Be sure you only begin to ice the cake after it has had plenty of time to cool. If you’re mixing icing colors, use your bowls and spoons to mix black, gray, and red icing. Don’t forget to set aside a little bit of white icing before you start with other colors.
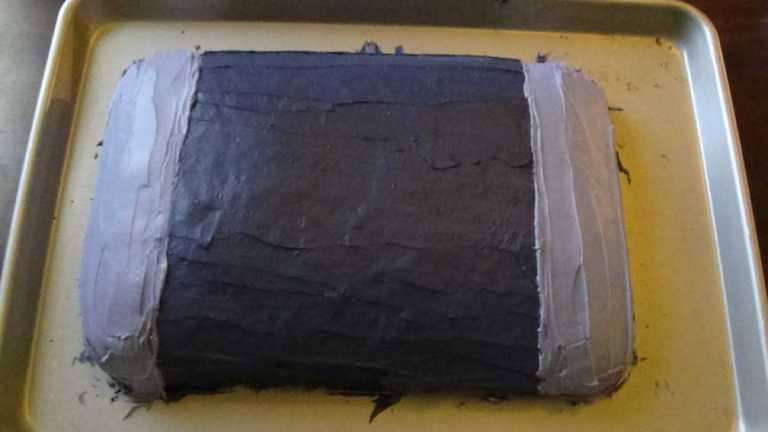
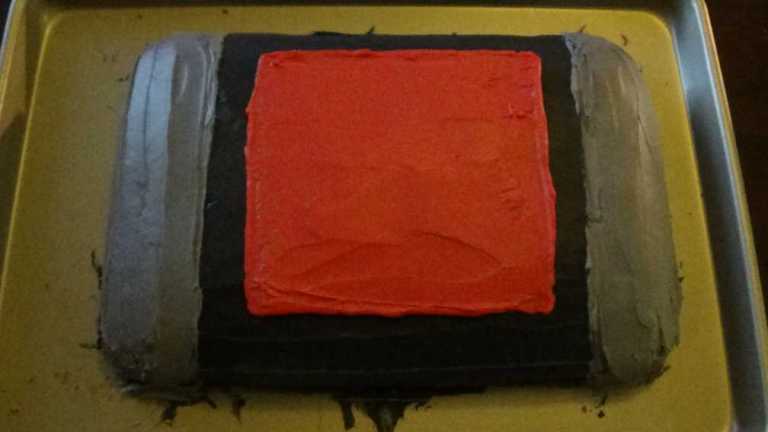
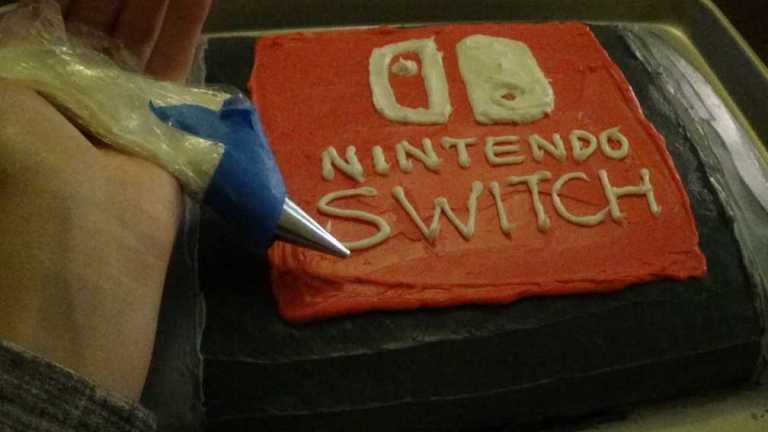
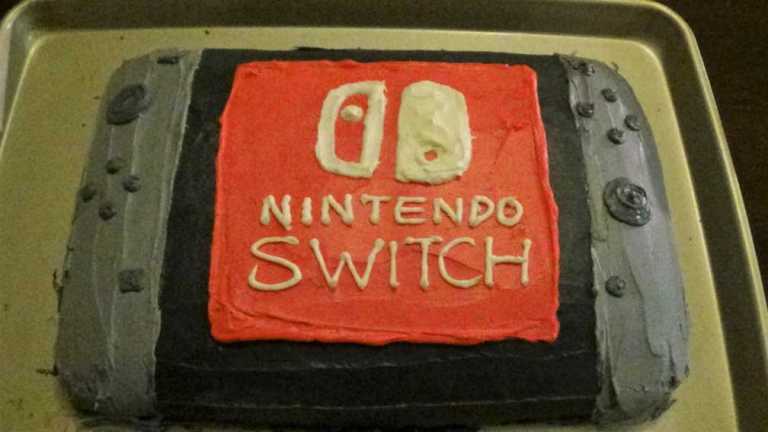
Essentially, this cake is iced in layers. I covered the entire cake in the black/ dark gray frosting, smoothing it out with a butter knife and then popped it in the fridge for it to harden. Then I iced the light gray for the Joycon controllers on the sides. I spread icing about an inch and a half inward on each side of the cake. Then I iced the screen in the middle in red. To make the sharp outline of the square, I filled a sandwich bag with frosting and then cut off one of the corners. After I filled in the red square the cake went back into the fridge. Finally it was time to ice on white details of the Nintendo Switch logo and text, along with the buttons and c-sticks. I also used the sandwich bag techniques for all these details.
Finally, then your cake is finished!